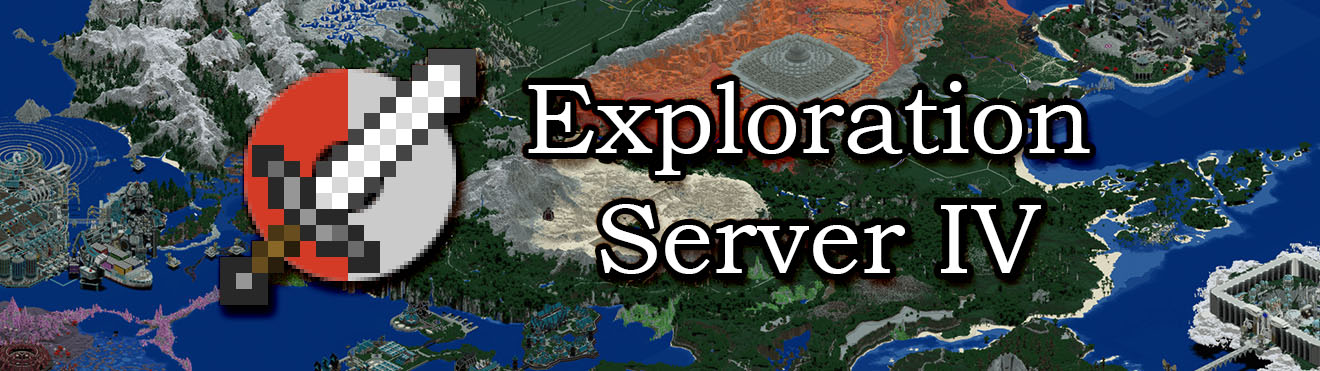
Exploration Server IV is an open world CTM-style adventure map, with leveling and RPG mechanics, that is also an expansive modpack which makes heavy usage of mods all throughout the map. The core concept behind the Exploration Server series is to collect a large number of builds made by other people, and showcase them by terraforming them all together into one giant cohesive game world. This is the fourth and final map in the series.
The map takes place on a continent 7000x6000 blocks large, with more than 15 key "story" dungeons to tackle. Each of these dungeons feature a boss battle at the heart of the dungeon which must be conquered to collect the key item from that boss. Collecting all of the key items gives access to the final dungeon, and later the post-game content. Within the world there are also 50+ optional mini-dungeons, towns, side-quests, and other points of interest, including custom HQM quest book missions, a heart container scavenger hunt, and a colosseum.
The map was meant to be reminiscent of an MMORPG experience, and was designed with 4-6 players raiding the dungeons together in mind. However, it can be played with less (or even in single player) for a greater challenge. Expected playtime to finish the map is around 150-200 hours.
Host an ESIV Server (Multiplayer Only)
- Download the ESIV Server.
- Configure the server.properties file if you need to... you know, the normal Minecraft server setup stuff.
- Open config/esiv.cfg and configure the spawn rate to your desire. The recommendation is 0.5 for 2 players, 0.75 for 3 players, and 1.0 for 4+ players.
- Create a .bat/.sh file for launching the server, with the following contents. Adjust the RAM allocation as needed.
java -Xmx8G -Xms8G -XX:PermSize=256M -XX:MaxPermSize=512M -jar forge-1.7.10-10.13.4.1448-1.7.10-universal.jar nogui
- Launch the server with your batch file!
- The recommended scoreboard setup is below. This will show each player's current level in the online players list (Tab), and will show each player's current health on the right side of the screen:
/scoreboard objectives add esivlevel dummy Level
/scoreboard objectives add health health HP
/scoreboard objectives setdisplay list esivlevel
/scoreboard objectives setdisplay sidebar health
- Note: ESIV should be hosted on private servers only (ie: whitelisted servers). Do not host ESIV on a publically accessible Minecraft server. Not all of the authors of the builds used in the map are okay with their builds being hosted on public servers.
Connecting to an ESIV Server (or play Single Player)
- Download Minecraft Forge 1.7.10-10.13.4.1448.
- Once Forge downloads, run it, and choose to install the Client.
- Download the desired version of ESIV:
- If you are going to play on a server: Multiplayer Version.
- If you are going to play alone: Singleplayer Version.
- Navigate to your .minecraft folder (C:/Users/{Your username}/AppData/Roaming/.minecraft)
- If you've already installed forge in the past, you may already have a 'mods' folder and a 'config' folder. Make sure both of those are empty!
- Extract the contents of the zip file into your .minecraft folder, overwriting anything it asks to overwrite.
- Only if you are going to be playing Multiplayer: Open the file .minecraft/config/CustomMainMenu/mainmenu.json in a text editor, and find the line that says "ip" : "" underneath connectToServer. Type the address of the ESIV server you wish to play on between the quotation marks, and then save the file.
- Run the vanilla Minecraft launcher.
- There should be a new profile in the launcher called 'Forge'. Within the Forge profile's settings, the recommended JVM Arguments are:
-Xms2048m -XX:NewRatio=3 -XX:SurvivorRatio=3 -XX:TargetSurvivorRatio=80 -XX:MaxTenuringThreshold=8 -XX:+UseParNewGC -XX:+UseConcMarkSweepGC
-XX:MaxGCPauseMillis=10 -XX:GCPauseIntervalMillis=50 -XX:+ExplicitGCInvokesConcurrent -XX:+BindGCTaskThreadsToCPUs -Xnoclassgc
- Save the launch settings, and choose Forge as the active profile for the launcher.
- Launch Minecraft. When it finishes loading, BEGIN!!!!
Important Notes / FAQ
Target Audience / Prior Knowledge
This is a very challenging map which requires you already have full mastery over the vanilla Minecraft mechanics and at least some familiarity with popular 1.7.10 Minecraft mods. Particuarly important to this map are Tinkers Construct, Thaumcraft, Ars Magica 2, and Botania. If you do not have familiarity with those mods, this map may be very difficult to overcome -- be prepared to spend some time on the Minecraft modding wikis or digging through the in-game tutorial books and NEI to get yourself up to speed.Known Major Glitches
- If you die, always choose to "Respawn" from the Game Over screen. If you exit to title from the Game Over screen, your character's ESIV level will be reset back to 1.
- If this glitch is encountered, an OP on the server can use the /esivlevel <player> <level> command to cheat a player's level back, as long as they remember what level they were at before their progress was reset!
- Wearing any of the "Travelers" gear from Tinkers Construct will break your character horribly the moment you take any damage. Travellers gear has been disabled from crafting and generally can't be found in the map, but ocassionally some high level mobs can drop them. If you find some, do not equip the armor from that set.
- You will know this glitch has been triggered if your character appears dead (fallen over to the side and colored red), the screen is shaking violently, but the Game Over screen is not visible, and you can still move around.
- If this glitch does get triggered, type /fixme in the chat, then unequip the armor.
- There is a similar glitch to above that is triggered if you unequip the heart container items (such that your Max HP is now lower than your current HP) then take damage. Either avoid unequipping the heart container items, or take damage until your HP is below 10 hearts before removing the containers.
Damage Formula
You may notice when first starting the map that you seem to not be able to do damage to anything. Damage output in this map is largely dependent on the difference in ESIV level between you and the monster. Your ESIV level is shown in the top-left corner of the screen, while monster levels are shown on their nametags above their heads. With no weapon, your punch only does 1 damage. Thus, if the monster is even a single level higher than you, that 1 damage will be dropped to 0 damage... and at the start of the map, almost everything will be higher level than you.Your first priority should be to craft yourself a weapon. Even a wooden sword will give you a small amount of leeway, allowing you to damage enemies at least a couple levels higher than you. Also consider doing some of the early-game HQM quest book quests as an alternate way to get your first few levels, other than killing mobs!
(Fun fact: If you're higher level than the monster, the damage formula will make even 0 damage weapons hurt the enemy, like snowballs!)
EXP and Item Drop Policies
When a monster is killed, the EXP for the kill is given to whoever landed the killing blow. There is no automatic EXP sharing system; the person who lands the last hit gets 100% of the EXP. There are EXP capsule items that are intended to be used for manual EXP sharing between players, such as when the levels of party members start to become unbalanced. If a monster is killed by an environmental factor, the kill cannot be attributed to a specific player, and thus no one will get any EXP. Additionally, in that case, the boss or monster will not drop any items. Environmental factors are things like fall damage, suffocation, lava, etc.Protected Zones
A few areas in the map are protected from you building/breaking blocks. If you try to break a block and it immediately reappears, or you try to place a block and it immediately returns to your inventory, it might not be because of server lag... you might just be in one of the block protected areas. (Very very few areas in the map actually have this protection applied, and it should be pretty obvious why an area is protected when it is)Disabled Items and Restricted Items
There are a large number of items / blocks / etc. that have had their crafting recipes removed in this map. They fall into two categories. Restricted items are still obtainable in the map, but must be found through exploration (maybe an NPC sells it somewhere, maybe it's loot from a dungeon, maybe some monster/boss drops it, etc). On the other hand, disabled items are not obtainable in any way.Disabled Items:
- Any item that allows you to change the time of day.
- Any item that allows you to change the biome.
- Any item that summons a boss. (Withers can still be summoned and will be LV 50)
- Any item or structure that allows you to move to another dimension (this includes Nether Portals, Twilight Forest Portals, etc.)
- Any item that acts as a chunkloader (for performance reasons).
- Most items that cause significant damage or alteration to the environment.
- Any item that allows flight.
- Various items considered too powerful / exploitative / game breaking / etc...
- Tinkers Construct Stencil Tables are disabled. Find the blacksmith NPC in the starting town; he sells all of the tool part casts. Tool part casts can also be exchanged in the crafting table for their equivalent stencil pattern (the tool part cast will not be consumed in this process).
- All crafting methods for vanilla metal blocks (coal, iron, gold, diamond, emerald, quartz, lapis, redstone) will produce blocks whose names are prefixed with "Synthesized". All recipes that require metal blocks now require these synthesized variants. The regular versions of the metal blocks found in structures throughout the map are basically just cosmetic now, and not usable for anything outside of decoration. The only exception is a couple multi-block structures still use the non-synthesized variants (such as the Botania Terrestrial Agglomeration setup). Note also for these exceptions, you can exchange a synthesized block for its cosmetic equivalent in the crafting table.
Map Credits
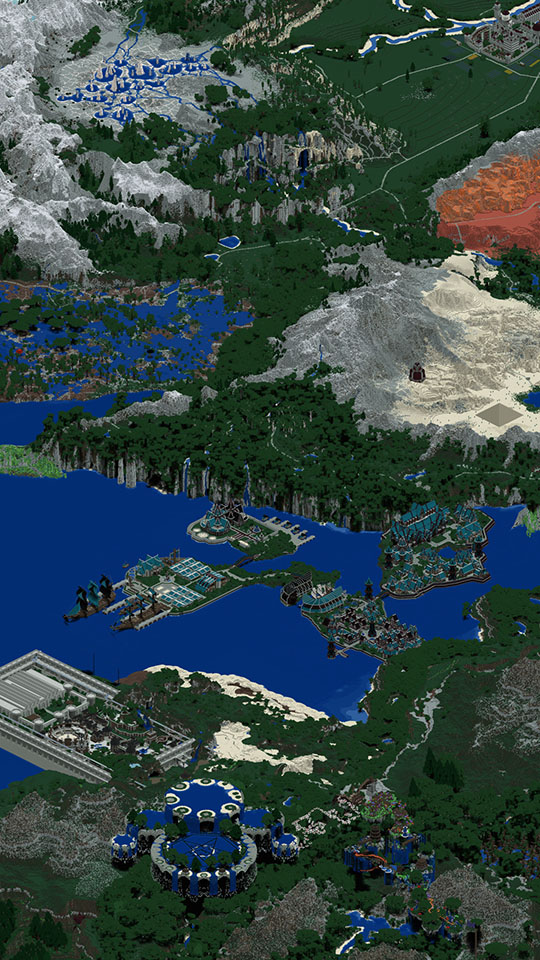 The map consists of a large number of builds made by other people, downloaded off of public map sharing sites, like Planet Minecraft. This is the core idea behind the "Exploration Server" maps -- showcasing all of the amazing builds by terraforming them together into a giant cohesive map that is designed to encourage thorough exploration. Some of the builds have requested to not be hosted on public servers, so please keep this in mind.
Full List of Map Sources
Full List of Mods
Music Credits
- Thanks to the members of the Minecraft Forge forums for their help and knowledge. This was only my second time trying to mod Minecraft, so I had a lot of stuff to learn.
- Terraforming was achieved with MCEdit and the WorldEdit mod. COFHCore's retrogen features were also essential to allowing me to get all of the modded ores and aura nodes into the map.
- A lot of the magic in the map was achieved with extremely heavy usage of the Mob Properties mod. I've probably written at least 10,000 lines worth of Mob Properties JSON config files for this map... it's amazing what it can do.
- All of the cross-mod recipe tweaks were made easy thanks to the Minetweaker / Modtweaker mods.
- Thanks to Vazkii for including implementations of many of the blocks from Minecraft 1.8 in Botania. This allowed me to write a python filtering script for MCEdit that converts 1.8 maps to 1.7.10, giving me a much larger sample of possible builds to choose from.
- Many of the modded monsters and creatures did not have hurt / death SFX (hell, even vanilla Minecraft squids and witches do not), so I've added custom SFX to all of these. These custom monster SFX were primarily sourced from MapleStory.
- Icons for the Energy Origin items are obviously from the Pokemon TCG.